Showing posts with label Silhouette Cameo. Show all posts

Sunday, 26 January 2014

My Batty Hero with Spectrum noir pens

Another Fabulous Tiddly Inks Digital Stamp

 
I love these images they make colouring fun. I have used the following pens for this image
 
Hair GB9 GB8 CT2
Skin FS9 FS4 FS2
Clothes BG5 BG4 BG3 BG2 OR1 OR2 

I used My Silhouette cameo for wham embellishment it was from the silhouette store. 


Saturday, 30 November 2013

Digi stamp Boutique
 
Well back to Christmas cards this week and I got this fab digi stamp from DigiStamp Boutique this week and its so cute and Christmassy
 
 
I loaded the image into Craft Artist and as it is a png I was able to put it over some backing paper that also got from DigiStamp Boutique I got this idea from Donna Barber. and it is a lot easier than cutting it out and layering.
 
 
The Card was cut out on my silhouette from a downloaded file called centre panel step card, I also loaded the backing paper straight into the silhouette and used the print and cut feature for all the backing pieces. My sentiment was from digistamp boutique too and printed and cut with the silhouette.
 
 
I have colour the image with pro markers and have glittered the snow and used glossy accents on the baubles and the snow mans lovely carrot nose.

Saturday, 23 November 2013

Home Decor

3D Picture Box

Just thought I'd have a break from Christmas craft this week and try some thing new too. I was inspired to do this from a pin on pinterest http://www.pinterest.com/pin/314689092682440976/
 
I printed a sheet of backing paper with a great text pattern and then put it into the silhouette cameo to cut out the hearts. I  used the negative part of the of the hearts as a template to line up the hearts on a plain white background. I print the pattern again to create a border.
 
 
I distressed the edges of my hearts with tim holtz antique linen distress inks and for the red one I used xmas red stickles.
 
 
I used 3d pads to lift the hearts for a great 3D effect.
 
 
I got the 3D box from hobby craft it was already painted white. Hope you like it.
 

Saturday, 26 October 2013

Christmas Bits and Bobs

 
Well I've been using the silhouette cameo again I downloaded this cute reindeer from the store its the perfect size to put a little chocolate in. I have made them for hanging on the Christmas tree for hidden treats


I punched a hole on either side and threaded butchers twine through for the hanging. For his little eyes I used flat back pearls and a lovely red rhinestone for his nose and the holly.

 
I have also made these gift tag labels using the print and cut feature on the silhouette and again used butchers twine. They were very quick and easy to make.


.

Wednesday, 9 October 2013

Christmas Snowflakes Using the Silhouette Cameo

 
I have really put my cameo to work this year with these fab snowflakes the snowflake was purchased from the silhouette store.


In my picture you can see how I placed the snowflake into the square to form my topper.


I cut lots out and ended up with lots of spare snowflakes so I decided to use these as well as you can see in my pictures
 
 
 For the sentiment I use my craft dragon to hot foil the merry Christmas. I also used crafters companion spray and sparkle on my coloured paper which has added a great sparkle.
 
Hope you like them.

Thursday, 6 December 2012

Christmas Card 2012

 
Well my silhouette Cameo has been working over time this month, I spotted this little reindeer face on the silhouette store and thought he was perfect for my christmas cards.

 
I used my craft dragon to hot foil the sentiment.


 The craft dragon is really good and produces a perfect finnish every time and look so professional. It also made it easy to produce lots of cards.


Saturday, 12 May 2012

Craft Dragon and the silhouette Cameo

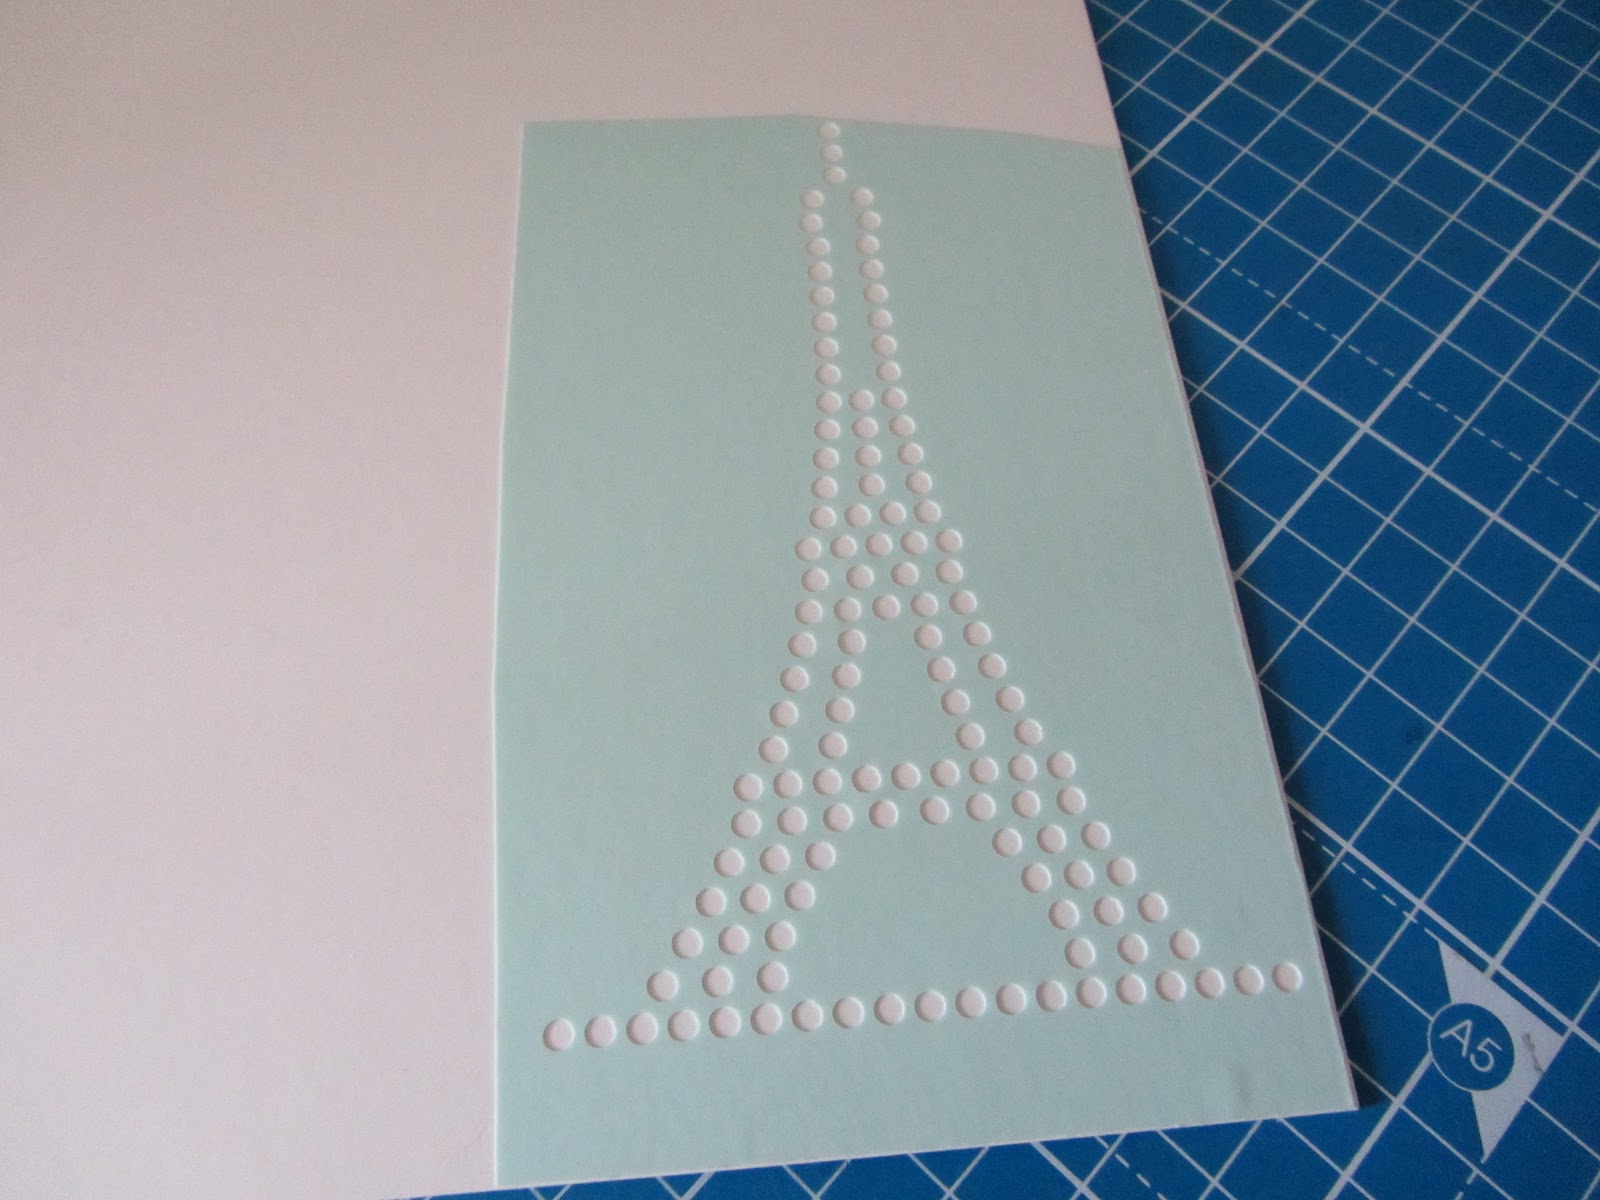
Here is my first project using my new craft dragon and the cameo. I thought I jazz up this plain old t-shirt with some vinyl and rhinestones. I have got the silhouette studio designer edition which allows you to convert any image to a rhinestone template. I love this Eiffel tower image so i thought i would change it into rhinestones, the soft ware even tells you how many stones it will use.


I then used this great vintage font to spell Paris, but I left out the a. I used some t-shirt vinyl that I got off eBay.


While I was preparing these bits I had the craft dragon heating ready to fix the items, for the vinyl the dragon needs to be on quite a hot setting and takes about 30 secs to stick. I fixed the vinyl first it has to be cool before you peel off the backing. Then I placed my Eiffel tower in to position and turned the heat down it only takes 15 seconds for the rhinestones to set and again they need to cool before the backing is removed.

Here is the finished project my new t-shirt